Instructions for configuring mail in opencart

During the web operation, the website will have sections for customers to fill out

Quick message to contact you, to receive other information, contact customers usually

We will configure receiving by mail the information will appear as in the contact form

on the web, here are the steps to configure mail in opencart

mail configuration in opencart

Step 1: Go to System > Settings > Mail to enter the mail configuration

Step 2: Configure mail and select save to save

Step 3: To send mail to accounts in the web, go to Marketing > Mail and fill in the email information to send and select Send to start sending.

Step 4: Go to your mail to check that the mail has been sent successfully

Conclusion

We have just completed the steps of configuring mail on opencart here we can create and send automatic mail for our opencart web .

Thank you for reading.

Bé Snake

Instructions for Backup and Restore in opencart

In the process of web administration we will need to store web data to prevent loss of web data, on the opencart web admin page there will be an effective backup and restore feature that we need.

Backup and restore on opencart

Step 1: Go to System > Maintenance > Backup / Restore > Backup > Select All > Export to export the backup file

Step 2: After clicking Export, the backup file will be downloaded and stored

Step 3: to proceed to restore web data, also create and re-login the above steps and
Go to Restore > Import and choose the backup file

Step 4: Wait for the restore process and notify the import successfully

Conclusion

We have just completed the backup and restore steps on opencart here we can actively backup our opencart web data  .

Thank you for reading.

Bé Snake

Firewalld installation instructions

Firewalld is a firewall system that uses zones and services to manage

Install firewalld

Step 1: To use the firewalld installation package, use the command

yum install firewalld 

Step 2: Then select yes to agree to download and install

Step 3: After the installation is complete to launch the firewalld service use the command

systemctl start firewalld 

Step 4: To check the service runs successfully use the command

systemctl status firewalld

Step 5: If you want, every time you start your computer on firewalld, start using the command

systemctl enable firewalld

Step 6: Check again using command

systemctl is-enabled firewalld

Step 7: Stop the firewalld service using the command

systemctl stop firewalld

or

systemctl disable firewalld

Step 8: List the zones using the . command

firewall-cmd –get-zones

Step 9: See which zone is default using the command

firewall-cmd –get-default-zone

Step 10: Change the default zone like public to work using the command

firewall-cmd –set-default-zone=word

Step 11: Then check again with the command

firewall-cmd –get-default-zone

Step 12: List rules in zones using command

firewall-cmd –list-all-zones

Step 13: The public zone shows that it is enabled and working by default using the ens192 network card running the dhcpv6 and ssh service

Step 14: Or you can use the command to see the running service

firewall-cmd –zone=public –list-services

Step 15: See the ports that are allowed to use the command

firewall-cmd –zone=public –list-ports

Step 16: View the system’s services using the command

firewall-cmd –get-services

Step 17: Allow the dhcp service to run in the public zone using the command

firewall-cmd –zone=public –add-service=dhcp

Step 18: Check if the translation is allowed to use the command

firewall-cmd –zone=public –list-services

Step 19: To cancel service like dhcp use command

firewall-cmd –zone=public –remove-service=dhcp

(or add –permanent if the service cannot be removed)

Step 20: add port 300 to the firewall’s public zone with the command

firewall-cmd –zone=public –add-port=300/tcp

Step 21: Add a port range 301 to 400 on the public zone using the command

firewall-cmd –zone=public –add-port=301 -400/tcp

Step 22: Check the ports added to the public zone using the command

firewall-cmd –zone=public –list-ports

Step 23: Remove the added port with the command

firewall-cmd –zone=public –remove-port=300/tcp

Step 24: Add your own hung zone using the command

firewall-cmd –permanent –new-zone=hung

Step 25: After adding the hung zone, reload the service with the command

firewall-cmd –reload

Step 26: Check again with the command

firewall-cmd –get-zones

Step 27: After creating the zone, you can make it default and add services and ports

Conclusion

We have just completed the basic steps of using firewalld on cenos7, where we can exploit and use to manage the operating system.

Thank you for reading.

Bé Snake

Instructions for using Pair key to connect ssh

Pair key is formed from public key and private key

The public key is placed in the server so that when the client connects, there must be a new private key server for the connection. This process helps to secure the server if unfortunately the ip is exposed and the password is detected.

Step 1: Use putty to run ssh key pair, select RSA 2048, click Generate to start generating keys

Step 2: Save the public key in turn by clicking the save public key button

Step 3: Save the private key by clicking the save private key button

Step 4: Then open it up and copy the key off


Step 5: Go to the server to create the .ssh file with the command

mkdir .ssh

Step 6: Create and edit the authorized_keys file using the touch . command

touch authorized_keys

Step 7: Go to the authorized_keys file using the command

vi authorized_keys

Step 8: Then paste the key pair

Step 9: Next, reset the ssh file with the command

vi / etc / ssh / sshd_config

Step 10: Edit the config file to

PermitRootLogin prohibit-password

PasswordAuthentication no

Step 11: Restart the service to update the config file using the command

systemctl restart sshd.service

Step 12: Go to putty, go to Connection>SSH>Auth then click Browse to select the saved ssh key

Step 13: login to the server using ssh

Step 14: Try to log in with another machine and immediately report an error

Conclusion

We have just completed the basic steps to install Pair key on ssh, here we can remote ssh securely with Pair key.

Thank you for reading.

Bé Snake

Instructions for installing Squid Proxy

Squid Proxy is a cache that fully supports popular protocols such as HTPS,HTTPS,FTP, which is placed in front of the web server and improves the speed and performance of the web server by caching these repeated requests. iterate and filter web traffic.

Install Squid

Step 1: To install squid use the command

yum install squid

and press y to agree to install

Step 2: Then start the service with the command

systemctl start squid

Step 3: Start squid with the server using the command

systemctl enable squid

Step 4: To test use the command

systemctl status squid

Step 5: Go to the config file using the command

vi /etc/squid/squid.conf

Step 6: Allow ip ranges to use squid proxy using the command

acl localnet src ip 14.241.230.0/24

Step 7: Enable more secure ports to access via Squid proxy similar to for web port connection using command

acl Safe_ports port 80

Step 8: The default port of squid proxy is 3128, you can change another port

Step 9: To create a login account for Squid proxy install the necessary tools using the command

yum – y install httpd-tools

Step 10: To create a file and assign permissions to the file use the command

touch /etc/squid/passwd && chown squid /etc/squid/passwd

Step 11: To create a hung user for squid proxy use the command

htpasswd /etc/squid/passwd hung 

Step 12: go to the config file of squid proxy and add user authentication configuration commands

Step 13: To restart squid proxy service use command

systemctl restart squid

Step 14: To block any web when using proxy use command

vi /etc/squid/blocked_sites

and add to site eg:domain.com then save and exit

Step 15: Go to the squid config file and add the web block file path using the command

acl blocked_sites dstdomain “/etc/ squid/blocked_sites”

http_access deny blocked_sites

Step 16: Then save and restart squid proxy using command

Systemctl restart squid

Step 17: Go to the client, connect to the proxy and check

Step 18: Check the connection of blocked websites

Conclusion

We have just completed the steps of installing and configuring our own squid proxy server, where we can manage ips and websites when connecting to the server.

Thank you for reading.

Bé Snake

Instructions for installing Mailserver with Zimbra

MAIL SERVER uses SMTP protocol as the server that performs the task of mail management to control the amount of mail sent and received to avoid spam mail cases, virus intrusion leading to mail block.

Set the server to use the domain name vdata.cf

Step 1: Change the server name to mail.vdata.vn using the command

hostnamectl set-hostname “mail.vdata.cf”

and add an MX record to use the mail server on the domain management web

Step 2: Edit the server’s hosts using the command

vi /etc/hosts

Step 3: Add the host ip and mail domain add the command

ip mail.vdata.cf mail

Step 4: To install netstat use the commands

yum -y install net-tools

Step 5: Install the necessary packages using the command

yum install unzip net-tools sysstat openssh-clients perl-core libaio nmap-ncat libstdc++.so.6 wget -y

Step 6: To create zimbra folder use command

mkdir zimbra && cd zimbra

Step 7: To download zimbra use command

wget https://files.zimbra.com/downloads/8.8.10_GA/zcs-8.8.10_GA_3039.RHEL7_64.20180928094617.tgz

Step 8: To extract the ZCS 8.8.10 file use the command

tar zxpvf zcs-8.8.10_GA_3039.RHEL7_64.20180928094617.tgz

Step 9: Then go to the file using the command

cd zcs-8.8.10_GA_3039.RHEL7_64.20180928094617

Step 10: To run the file using the command use the command

./install.sh

Step 11: Select y to agree to install packages

Step 12: After checking the pointed mail.vdata.cf domain, press enter to continue the installation process

Step 13: Then choose 7 and 4 to choose to set password for admin mail

Step 14: Then follow the instructions and save to /opt/zimbra/config.

Step 15: Then go to the web to check https://mail.vdata.cf:7071

Step 16: If you want to send a message to a new mail, enter the name of the email you want to send to and click send

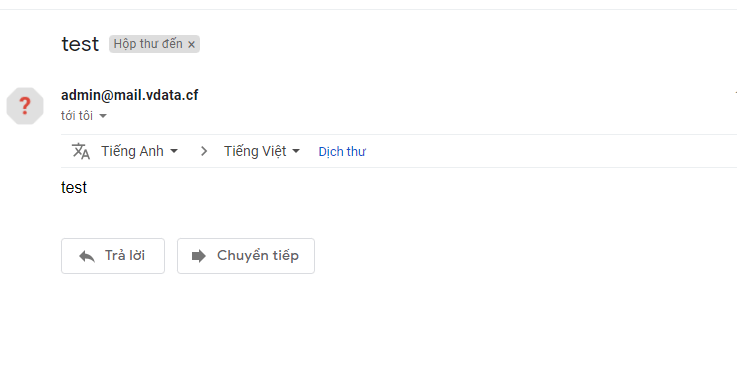
Step 17: Check sent successfully

Conclusion

We have just completed the steps to configure and install the zimbra mail server running with the domain name mail.vdata.cf here we can manage and set up our own mail server system under the business domain name.

Thank you for reading.

Bé Snake

Bonding Installation Instructions

Bonding is a combination of many links of network cards in the server for higher speed as well as a backup plan when a network card has a problem.

Install Bonding 

Step 1: install Bonding by command

modprobe –first-time bonding

Step 2: Check the successful installation of Bonding using the command

lsmod | grep “bonding”

Step 3: Create a configuration file for bond0 with the command

vi / etc / sysconfig / network-scripts / ifcfg-bond0

Step 4: Configure the file ifcfg-bond0

+ Mode =  0 : balance-rr
+ mode = 1 : active – backup
+ mode = 2 : balance – xor
+ mode = 3 : broadcast
+ mode = 4 : 802.3ad
+ mode = 5 : balance – tlb
+ mode = 6 : balance – alb

Step 5: There are 2 network cards, respectively ens33 ens36, configure the ens33 network card to enter the configuration file using the command

vi / etc / sysconfig / network-scripts / ifcfg-ens33

Step 6: Configure the ens33 . network card

DEVICE = ens33

TYPE = Ethernet

ONBOOT = yes

BOOTPROTO = none

NM_CONTROLLED = no

MASTER = bond0

SLAVE = yes

Step 7: Go to the ens36 network card configuration file using the command

vi / etc / sysconfig / network-scripts / ifcfg-ens36

Step 8: Configure the ens36 . network card

DEVICE = ens36

TYPE = Ethernet

ONBOOT = yes

BOOTPROTO = yes

NM_CONTROLLED = no

MASTER = bond0

SLAVE = yes

Step 9: Restart the network service with the command

service network restart

Step 10: Check the installed bonding with the command

cat / proc / net / bonding / bond0

Conclusion

We have just completed the basic installation and use of bonding steps, here we can provide network redundancy options for the server, or load balance for the network, depending on usage needs.

Thank you for reading.

Bé Snake

SSH Installation Instructions

SSH is remote connection protocol default connection port is 22 with alternative encryption telnet

SSH Installation Instructions

Step 1: To install ssh use command

yum install – y openssh openssh-server openssh-client openssl-libs

Step 2: Start the service using the command

systemctl start sshd

Step 3: Want ssh to run after starting the server use the command

systemctl cho phép sshd

Step 4: To allow external connections to the server use the command to turn on the firewall to allow port 22 of the public zone in (if the server uses a firewall)

firewall-cmd –zone = public –add-port = 22 / tcp

Step 5: Check ssh using command

systemctl status sshd

Conclusion

We have just completed the SSH installation instructions, here we can follow the next article to use Pair key to connect to ssh .

Thank you for reading.

Bé Snake